Automating the Deployment of Windows 10 Fonts

In this post we will explore how to deploy fonts to Windows 10 devices at scale programmatically. I know some of you may be thinking - "I've deployed fonts many times over the years - what's the problem?". And I guess the rest of you are here because you've hit the same difficulties I did when I was tasked with deploying custom fonts across an organisation. Since Windows 10 version 1809 the steps required to automate this installation using scripts have changed. Most articles and blogs you find online will feature code that simply copies the font files to the C:\Windows\Fonts folder - these will no longer work.
The next section of this post is an analysis of what has changed and why the previous method no longer works. If you don't give a shit and just want to know how to do this so you can get on with your day then scroll down until you see the Solution heading.
The Old Way
Let's start by looking at basic Powershell that could be used to programmatically install fonts before 1809.
$FontCLSID = 0x14
$ShellObject = New-Object -ComObject Shell.Application
$Folder = $ShellObject.Namespace($FontCLSID)
$Folder.CopyHere("C:\CustomFont.ttf")
Let's break this down...
$FontCLSID = 0x14First of all, we're setting the $FontCLSID variable to 0x14 - this is the unique CLSID of the Fonts COM class object.
$ShellObject = New-Object -ComObject Shell.Application
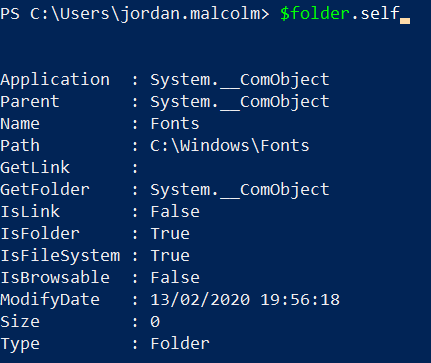
$Folder = $ShellObject.Namespace($FontCLSID)Next, we're creating a new Shell.Application object and then calling the Namespace method while passing our CLSID set above. This is creating a folder object for the Fonts folder and storing it in the $Folder variable. We can use $Folder.self to display more information on the folder object.
$Folder.CopyHere("C:\CustomFont.ttf")Finally, we are calling the CopyHere method on the folder and passing the font file to copy the font into the C:\Windows\Fonts directory.
Seems simple enough right? If you go ahead and put all of that together and run it you'll find the font is installed and useable. Now go ahead and log in as any other user account and you'll find the font does not show.
The Problem
The key thing that changed in 1809 was the release of a new feature that allowed users to install new fonts without the need for administrator rights. If you right-click a font file you will see there are now two install options "Install" and "Install for all users"

Let's use Process Monitor (https://docs.microsoft.com/en-us/sysinternals/downloads/procmon) to compare how these differ when run. First of all the "Install" option...

After cutting out most of the noise we are left with the three entries above. We can see that the font is copied to the Appdata folder but there is also a registry value created in the users registry hive.
Now let's see what happens with the "Install for all users" option...

The file is copied to the C:\Windows\Fonts folder but this time the registry key is created in the Local Machine hive.
Let's run the old method again from the section above and perform the same analysis. I'm going to run the script from an elevated Powershell prompt using an account that has local administrator privileges. One would assume that this would have the same outcome as the "Install for all users" right-click option.

As you can see this creates that crucial registry key in the Current User hive and not the Local Machine hive, and the file is copied to the AppData folder of the user (and not the central C:\Windows\Fonts folder). This results in the account running the script being the only user that can see the font. This is far from ideal when you deploy fonts at scale as you are likely using a tool such as Microsoft System Centre Configuration Manager (SCCM) to deploy these in an automated fashion. The way these tools work without the user having administrative rights is by running the scripts/installers/packages as another user that does have administrative rights such as a service account.
Solution
As we found above there are two things we need to do to install the font for all users:
- Copy the font files to the C:\Windows\Fonts folder
- Create a registry value in "HKLM:\Software\Microsoft\Windows NT\CurrentVersion\Fonts" referencing the font filename
We can use the simplified script below to install a single font for all users.
Copy-Item "C:\CustomFont.ttf" "C:\Windows\Fonts"
New-ItemProperty -Name "Custom Font Name (TrueType)" -Path "HKLM:\Software\Microsoft\Windows NT\CurrentVersion\Fonts" -PropertyType string -Value "CustomFont.ttf"
You might also want to pass an entire folder of font files to be imported which you can do with:
$FontFolder = "\\NetworkShare\FontsFolder"
$FontItem = Get-Item -Path $FontFolder
$FontList = Get-ChildItem -Path "$FontItem\*" -Include ('*.fon','*.otf','*.ttc','*.ttf')

foreach ($Font in $FontList) {
        Write-Host 'Installing font -' $Font.BaseName
        Copy-Item $Font "C:\Windows\Fonts"
        New-ItemProperty -Name $Font.BaseName -Path "HKLM:\Software\Microsoft\Windows NT\CurrentVersion\Fonts" -PropertyType string -Value $Font.name
}